Quarkle Comments are another popular way to get developmental feedback from our system. Think of these are line-edits left behind by your editor. In most cases, you will also have an accompanying sentence re-write that you can apply immediately.Documentation Index
Fetch the complete documentation index at: https://quarkle.mintlify.app/llms.txt
Use this file to discover all available pages before exploring further.

Get Quarkle Comments
Step 1 - Click on Review in the Right Panel Step 2 - Scroll down to _Editing Insight_s and click on Generate under comments Step 3 - Wait while Quarkle reads and annotates your work Step 4 - View the comments, view the re-writes, and Implement as neededHow to view the differences
Step 1 - Go to the comment Step 2 - Click on the “Eye” icon. Here, you can see the edit as a combination of text deletion and additions. Step 3 - Apply the changes by clicking on Implement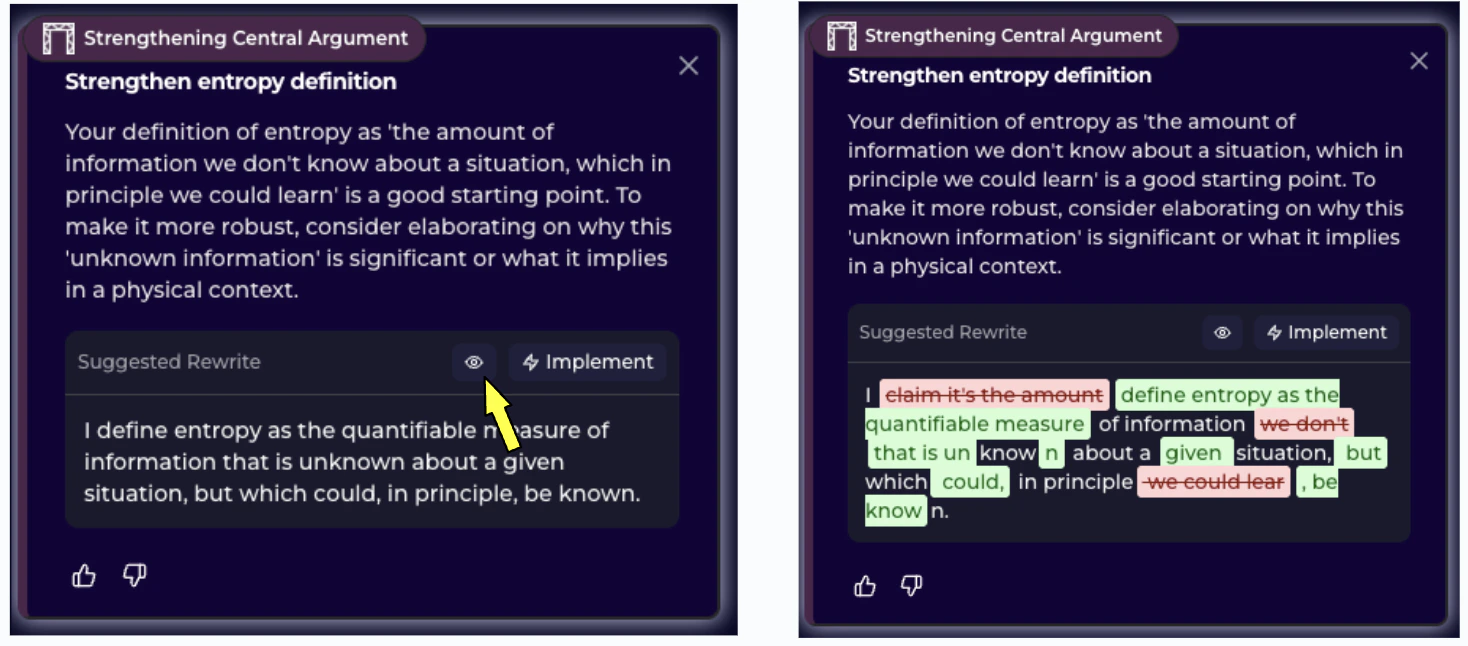
Filter comments by Tier or Agent
We get it, sometimes, too many comments might be distracting. Or you may not be interested in Grammatical comments while working on Character development. We have a few filters you can apply. For the following steps, ensure you have some existing comments already, or generate new ones. Step 1 - Go to the Review tab in the Right Panel Step 2 - Right above your existing comments, you’ll see a **Filter by **section. Click on the Tier of comments you are interested in. Step 3 - Optionally, you can change the view to **Agent View **which can filter the commentary by the agent who wrote it.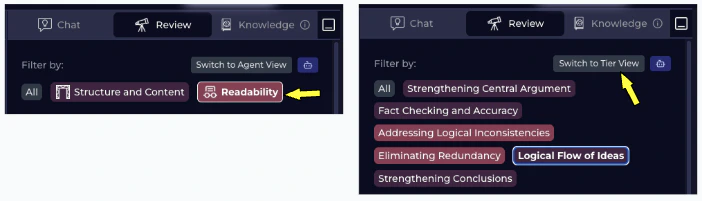
Customize Review Agents
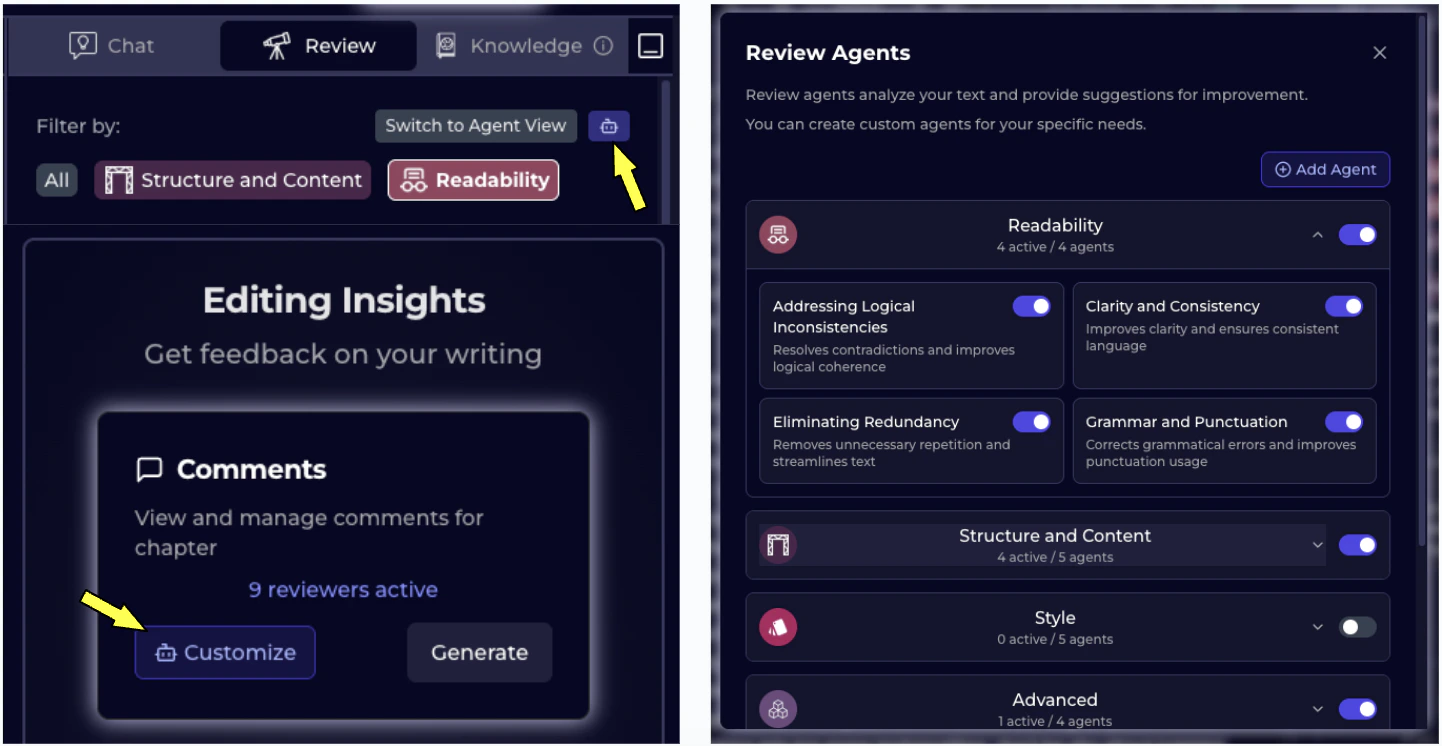
Everyone has different editorial needs. While we’ve tried to set good defaults, if you’re a serious writer, you might want additional controls on the type of feedback you want. Step 1 - Click on Review tab in the Right Panel Step 2 - Looking for Editing Insights and click on Customize*.* Alternatively, you can also look for a Bot emoji in the filter bar. Step 3 - A Review Agents popup should open Here you can -- Turn off an agent, eg. Clarity and Consistency
- Turn off a tier of agents, eg. Readability
- [PRO] Add new agents
- Toggle Automatic Comments
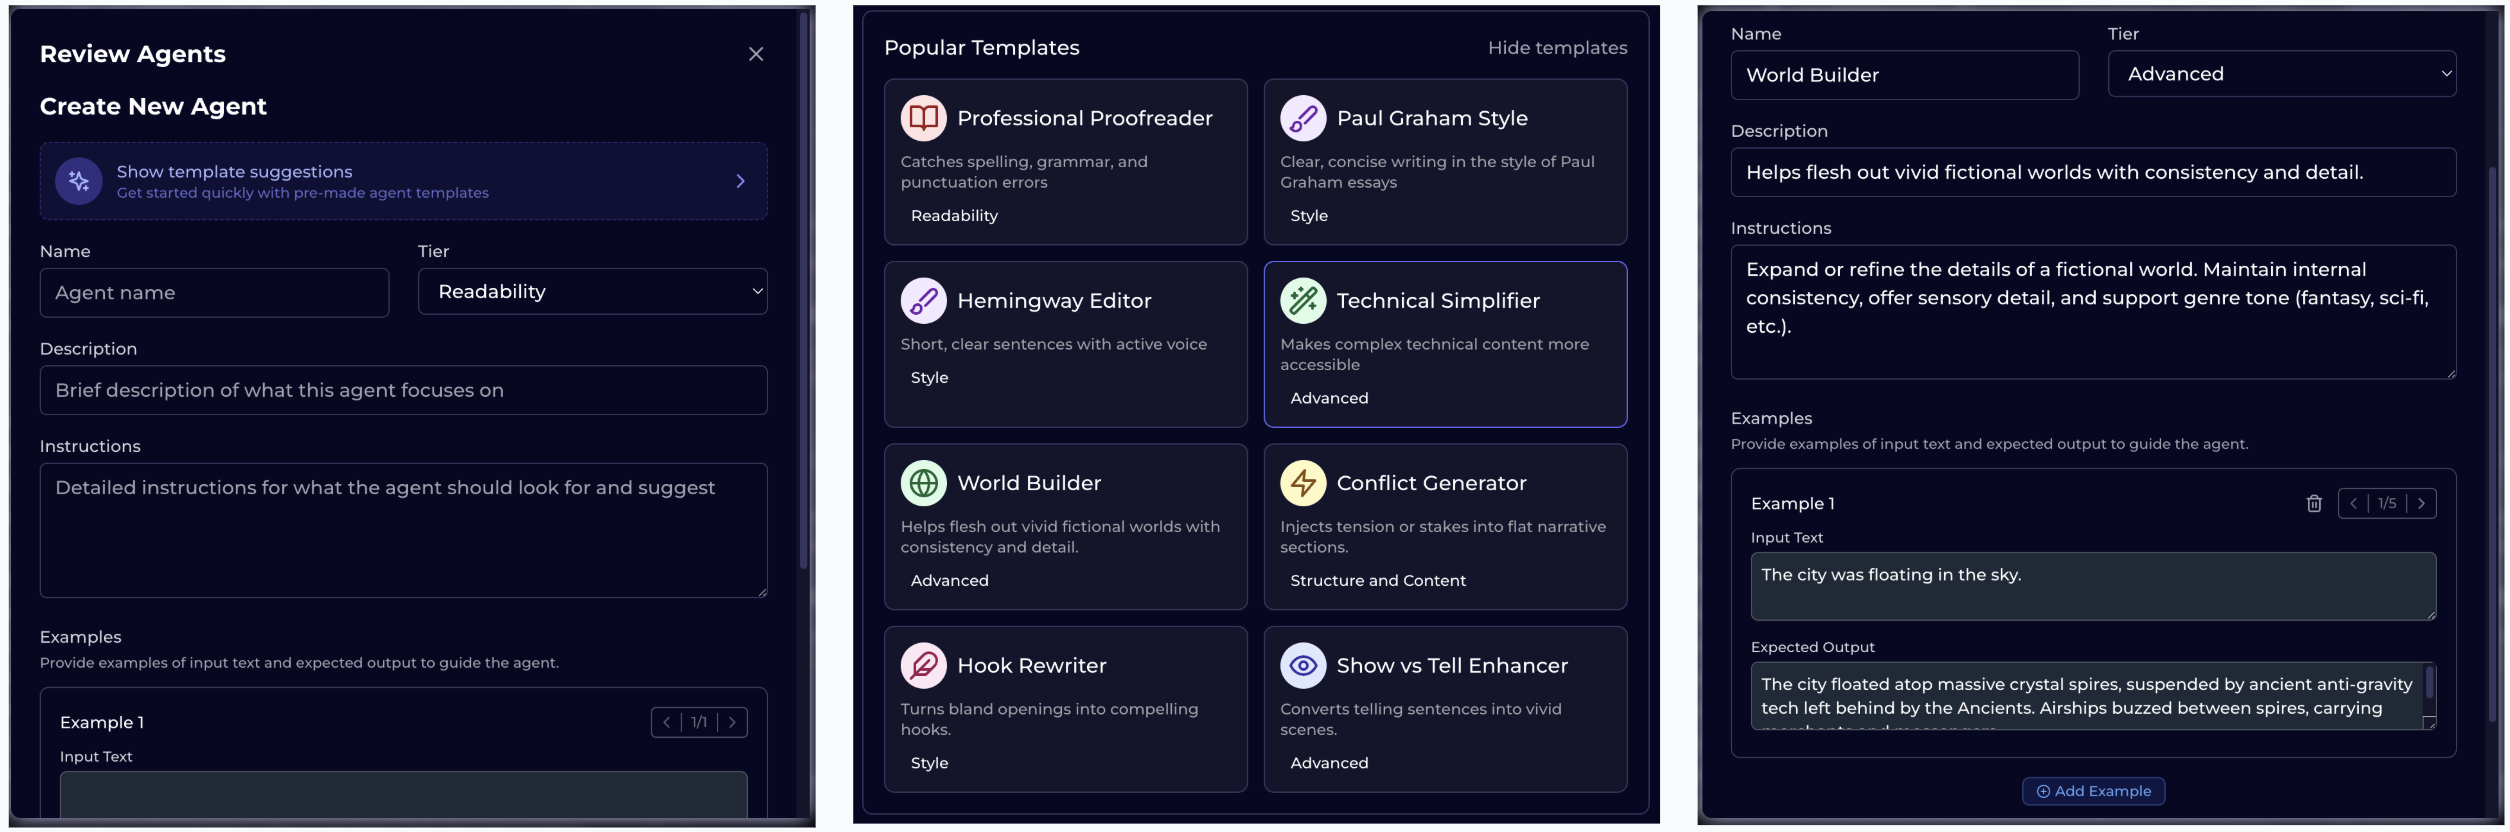
How to add a new Review Agent
Pro users can add their own Review Agents. This is helpful when you want directed and specific feedback. Step 1 - Open Review Tab in the Right Panel Step 2 - Find Customize in Editing Insights Step 3 - Click on Add Agent and wait for popup Step 4 - Add the required information OR select from existing Agent template Step 5 - Be as detailed as possible, that will result in better edits